Turning the M1A into a match rifle. Part One

Turning a rack M1A into a match rifle.
Written By: Brandon Pritchard, Master Gunsmith at Freedom Forge Armory
Photos By: Freedom Forge Armory
First Instalment
“But wait? Isn’t the M1A already a match rifle? That’s what the guy with the 1911, at the gun shop told me.”
The M14 or M1A. There is a lot of myth and legend that surrounds this rifle. It has a gun shop reputation for amazing off the rack accuracy that is over hyped. So let’s start with facts. The M14 was the shortest serving main battle rifle in US history, only 5 years, right up there with the M1892 30-40 Krag, and its adoption was almost as controversial as the M16 that replaced it.
The M14 was developed by Springfield Armory (the US Government Arsenal, not the commercial firearms manufacturer of today) and adopted after the Korean War as a replacement for the M1 Garand. Improvements in gunpowder allowed this new rifle to be chambered in a shorter .30 caliber cartridge, the 7.62x51mm or .308 Winchester. The Army infantry board that drove the testing and adoption claimed that it would be virtually interchangeable with the M1, and fill the roles of the M1 Garand, M1918 BAR, M3A1 grease gun, M1 and M2 carbine. None of which was true, and John Garand even pointed this out to the Army. It was too heavy and powerful for the submachinegun role, it was too long for the carbine role, and was to lite for the squad automatic rifle role. The ammunition was heavy and the accuracy of the rifle in semi auto was exaggerated as well. A September 1964 report by the US Army Test & Evaluation Command called the M14 inferior to the M1 Garand that it replaced. That’s a pretty damning statement.
The M14 rifle didn’t perform well when compared to the FN FAL and H&K G3 that most of the rest of NATO selected, or the AK47 it was up against in the jungles of Vietnam. Ultimately it was replaced in front line service by the M16, it was then put to use in very limited numbers as the M21 sniper rifle (A highly modified National Match M14) which was retired when the M40 sniper system was introduced. The M14 was again pressed back into service as a squad designated marksman rifle in Iraq and Afghanistan. As those conflicts come to a close the M14 will in all likelihood be shelved for good as the services adopt variations of the AR10 and FN SCAR 17H in 7.62mm to fill the squad designated marksman and sniper rifle role.
All that being said like any rifle it can be made to shoot more consistently and for many years the M14 and M1A dominated at the National Matches. That’s what I’m going to do with this M1A, accurize it and make it match ready.
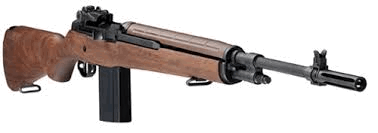
What I’m starting with is a standard grade Springfield Armory M1A, it’s as close to an as issued M14 as most folks can afford to get. The M1A is the civilian (Not Full Auto Capable) version of the M14. Springfield produces upgraded versions of this rifle that, for the most part are match ready out of the box, the Loaded, National Match, and Super Match, and they come with hefty price tags.
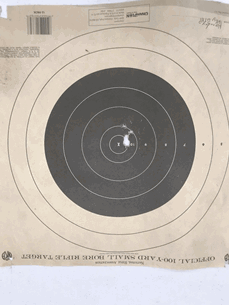
To know the direction we have to go with this rifle, we have to know where we’re coming from. So I headed out to the range and fired a few zeroing groups at 36 yards just to get it on paper. I started with 147gr M80 BALL ammo, this is NATO standard and what was originally fielded with the M14.
Per FM 23-8 Rifle Marksmanship dated April 1974 the rifle is zeroed when it will hit consistently with in a 1” to 2” circle at 25 yards. That’s 4” to 6” groups at 100 yards.
(Personal Experience: A few years ago when I did retail gun sales I had an M1A come back with the customer complaining that there was something wrong with his rifle, because it wouldn’t hold zero. After the usual questions about ammo and functioning, it’s the same story. I can only get 3” to 4” groups out of it at 100 yards. I had to explain to them that, there is nothing wrong with the rifle, that’s what it was designed to do.)
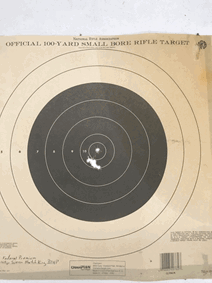
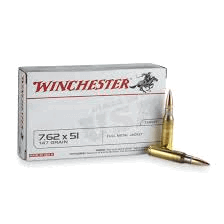 Winchester, 7.62x51, 147 gr NATO .308
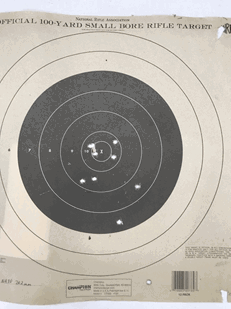
Shot group with 147gr, 7.62 NATO
Not too bad over all, acceptable battle rifle accuracy, but this is a 36 yards. At the distances shot in high power competition this would look like a shotgun pattern.
OK lets’ step it up to match ammunition. For this test group I used Hornady .308, 168gr HPBT match. This is a true match grade round.
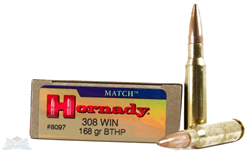 Hornady, .308, 168gr BTHP MATCH
Shot group with 168gr match, .308
It tightens up the group, and notice the point of impact shift.
Now, both of these groups are acceptable for a battle rifle, but that’s not what we’re after here. If I were to take this rifle as is to an NRA high power match I’d get smoked by the competition. I routinely shoot in the 390’s to 410’s in 500 agg matches, so in this instance it is case of the equipment not being up to the task. I often tell shooters that there is a right tool for every job and if you try to use the gun in a role that it wasn’t designed for you’ll be disappointed.
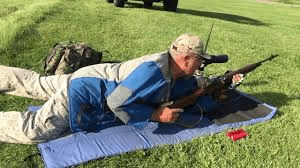 Springfield Match at Camp Perry National Matches
In the heyday of CMP and NRA high power service rifle competition the M1 Garand and M14 / M1A were the rifles to beat, now days it’s the AR15s like the Freedom Forge Armory ESPR MATCH that dominates and the M1 and M1A is a rare sight except in special matches just for those rifles, and at local matches where titles aren’t on the line.
So why don’t we see the out of the box accuracy that that M14 is legendary for, well it takes a lot of work to make an M1A shoot 1 MOA or better, that’s what the shooting teams for the Army and USMC discovered, and they developed the accurizing methods I’m going to use on this rifle. The M14 also has a lot of moving parts when compared to other rifles. The operation rod and spring, the bolt, and the gas piston, are all moving during the firing sequence, combined with the military grade trigger pull, and the “minute of man” sights on it. All of these moving parts induce vibration and flexing that causes the rifles point of impact to shift between shots, and the sights give a wide field of view for hitting man size targets out to 500 yards.
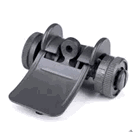

All of the moving parts and battle sights
So there is a few things that we can do to mitigate these factors and bring the gun back under 2 Minute Of Angle (MOA).
Original M14 stocks were prone to poor fit, flexing, and warping with moisture. When going for accuracy, the receiver to stock fit is critical. So I’ll start with reworking the stock.
The Army Marksmanship Unit (AMU) discovered the same problems with their M14’s, their method for fixing the problem was to impregnate the entire walnut stock with epoxy to stiffen it and make it less susceptible to flexing during firing and swelling from moisture. It was a time consuming process that took several days for each stock and involved baking it in a vacuum several times as layers of epoxy were added. I’m not going to do that.
There are a few ways we can fix this, one is to purchase a GI surplus fiberglass stock. These stocks are made of stiff polymers and fiberglass that minimize flex and movement. Surplus GI M14 fiberglass stocks are still relatively cheap and available. I want to use the parts that came with the gun so I’ll keep it in the walnut stock, plus I like the look of the walnut. If you plan on using this rifle for NRA or CMP service rifle competition the GI fiberglass or equivalent match grade stocks are legal. The other method is to bed that action, you’ve probably heard that term before but never really knew what was involved in bedding an action.
Glass bedding is the most involved, easily messed up, and should be left to an experienced gunsmith. It takes several days to properly glass bed an action. This method completely locks the action in the stock for a perfect fit. If you are going all the way with a heavy match barrel, rear lugged receiver, and National Match parts this is the best method to use. It involves cutting channels in the stock and filling spaces around the receiver and trigger group with a fiberglass resin to eliminate any movement. Out the gate this method gives us the best fit, but there are some down sides. You can’t remove the action for cleaning or maintenance, doing so will destroy the fit. Eventually the bonds between the stock and glass bed do break down with repeated recoil and stock flexing, add to that if you shoot in a humid environment like I do (central Virginia) even a well-seasoned wood stock will still absorb some moisture.
The way this disbonding usually happens is, you’re out there shooting the best match you’ve ever shot, and all of a sudden you get a flyer, then another, and another. Mentally you’re falling apart now. Between strings you check the rifle and discover that the glass bedding has disbonded. You quietly pack your stuff, leave the match, wear a paper bag over your head for the rest of your life, and never shoot again.
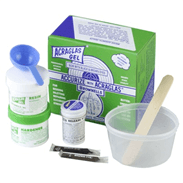
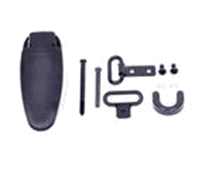
Acraglass from Brownells is the most common resin used for glass bedding and action. National Match stock kit, the hardware found in the NM stock kit has a tighter tolerance than the standard GI hardware. I’m going to use some bedding blocks to tighten things up. This tighter fit controls the flex and movement of the action in the stock.
I’m going to use a different method for bedding the action. I’m going make some bedding blocks along with using some of the hardware from the National Match stock kit to tighten up the fit of this rifle.
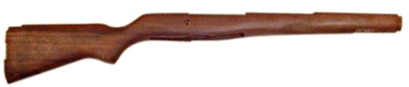
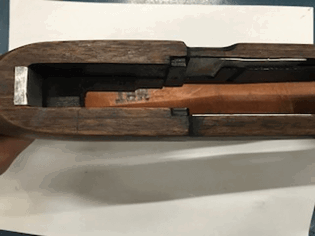
Boyds oversized Walnut M1A stock
This rifle came with a new oversized Boyds walnut stock so the stock fit is already pretty tight, but let’s say your rifle is older or it has a surplus stock on it and there’s some movement of the trigger group and action. Now, using bedding blocks is not the best fix but it will significantly tighten the fit up, and block bedding will last significantly longer than glass bedding, and if done properly the action can still be removed for the stock. Bedding with this method should be done in such a way that it makes the fit tight but does not put additional stress on the action. You can overdo it and tweak the action causing the accuracy to get worse or the gun to start malfunctioning. If you bed the action and have to use a lot of force to get it into the stock, it’s too tight. Even though this stock was new and pretty tight already I was able to get a set of .020” blocks around the receiver lugs and rear of the receiver to improve the fit of the action and trigger group to the stock, it’s important to bed the receiver in such a way that it eliminates all movement of the action in the stock. When doing this it’s also important to not go crazy with the adhesive, and accidently glue your receiver into the stock.

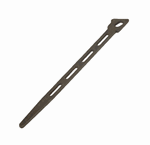
 0.020” bedding blocks made for this stock and installed in the stock.
This new walnut stock was bone dry and had some roughly finished area, this creates two problems. One this stock will soak up any liquid like a sponge and two the rough areas can affect accuracy. The cure for this is as old as walnut and steel. We need to season it. I use boiled linseed oil and 000 steel wool. Starting with the steel wool and working the stock with the grain until its smooth. Then rub in the oil. The goal is not to coat the stock, it’s to work it into the grain so the stock won’t absorb water. This may take many applications over several days, rub the oil into the stock, let it set for an hour and then wipe off the excess, hit it with the steel wool, repeat. You’ll know you’re done when the oil just sits on the stock and doesn’t soak in any more. As a final finish I ran some 600 and 800 grit sandpaper over it a few times to get it as smooth as posable. Seasoning with oil should be done at least once a year. After seasoning this stock I sealed it with polyurethane to further reduce the swelling of the stock and hold in the oil. This stock was also rubbing on the oprod guide so I relieved that area in the stock so the barrel and oprod float as much as they can.
The trigger, the majority of casual shooters have been shooting rough stock triggers their entire lives. It’s not that they don’t care, they just don’t know any better. If all you’ve ever driven is a Ford, then you don’t know what driving a BMW feels like, and it’s the same with triggers. A trigger job is not difficult, but if you have a short attention span, you might want to leave it to the professional. The goal of a trigger job is not to remove metal. The goal is to polish the metal contact surfaces. The only thing needed are polishing stones, and a trigger pull gage.
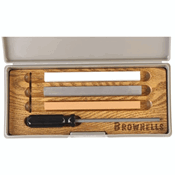
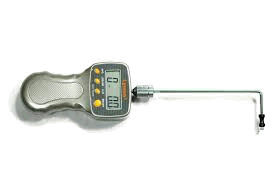 Trigger polishing stone set and pull gage from Brownells
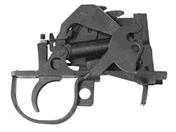
The trigger group must be disassembled to do this, it can’t properly polish the surfaces while it’s assembled. Polish the engagement surfaces of the sear and hammer. The goal is to remove the finish and rough areas from casting and machining, and make the metal bright and smooth. Working slowly and evenly I want the trigger to break at 5 to 4.7 pounds, originally this trigger broke at 7.5 pounds. So why 5 to 4.7 pounds? Because 4.5 is the minimum and if I took it all the way down as it continued to wear it would become even lighter, out of limits, and potentially unsafe. A properly polished trigger should glide right to the release point and break like a thin glass rod. During this process it’s necessary to reassemble the trigger group to check the feel and weight of pull, a proper trigger job is more an art form than a science, and very time consuming.
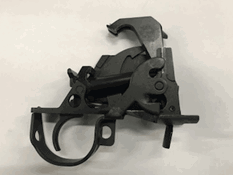 Trigger group reassembled after polishing
While I’ve got the trigger group disassembled I’m going to look for burs and areas that are rubbing. In a new gun like this one that’s not going to be evident until after a few hundred rounds. I’ll take this one apart again in a few months to see where its wear points are and smooth those out. Believe it or not the best triggers to do this with are safe older ones, an old trigger group is already worn in and requires less work to smooth out, you can do it with a new one like I’ve done here, but down the road I’m likely going to have to go over it again. Another thing that can be done is to change the hammer spring to an extra power spring for faster lock times.
Now I can stop here and the gun will perform respectably, I’ve hit the major areas of concern in the stock to receiver fit and the trigger, for the casual shooter this rifle would more than do the job for weekend trips to the range, you could impress your friends with it. Unless your friends are service rifle shooters.
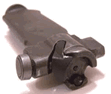
Let’s keep going. The piston is next, unlike the M1 with its combined oprod and piston, the M1A has a separate piston and oprod.
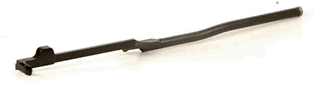
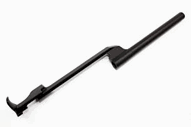
 M1 oprod M14 piston and oprod
This is the stock GI piston from our M1A. I could replace it with a National Match piston from Sadlak Ind, replace it with a standard National Match piston, or give it a light polish, because I want to use the original parts, I’ll give this one a light polish. I mean light, we don’t want to remove any metal so a clean muslin buffing wheel is what we’ll use, a couple of light passes on the buffing wheel so the surface of the piston looks smooth and shiny, and that’s it.
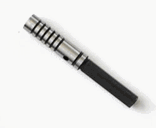
A part that should be replaced on every M1A regardless of what it’s being used for is the Op rod spring guide. The GI guide is a sheet metal stamping and it flexes a lot during firing. Replace it with a National Match guide rod. They are machined and control the spring and vibration and movement much better than the GI spring guide. A NM guide should cost around $50, but I’m not going to change it right now.
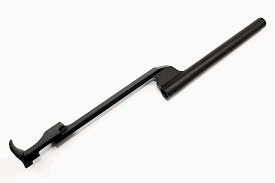
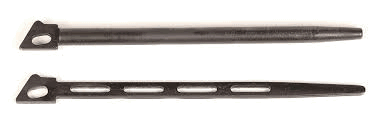 GI spring guide, bottom and Sadlak NM spring guide, top
So let’s take it out and shoot it. Like before I’m using 147gr BALL and 168gr HPBT MATCH and shooting at 36 yards for this session.
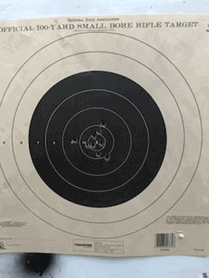
Shot group with 147gr BALL
Shot group with Federal Premium Match 168gr, .308
We can see the groups have tightened up to under +3 MOA and the point of impact has shifted. I haven’t messed with the sights sense the first shooting session with this rifle. So all of the things I’ve done have so far have had an effect on accuracy. You could expect to shoot a 310 to 330 in a 500 agg match with this rifle, that’s decent but it won’t get you to the top of the leader board at Camp Perry. Now at this point I’ve done all I can do with the stock parts that came with this rifle. It’ll shoot better than it did out of the box but it’s nowhere near competitive by todays’ standards. Remember that this is a rifle that has its’ design based on the M1 Garand that was developed in 1937. It’s a solid rifle but its’ been surpassed technologically speaking.
We’ll explore tuning this rifle up to true match grade in the next instalment. Until then, go burn powder.