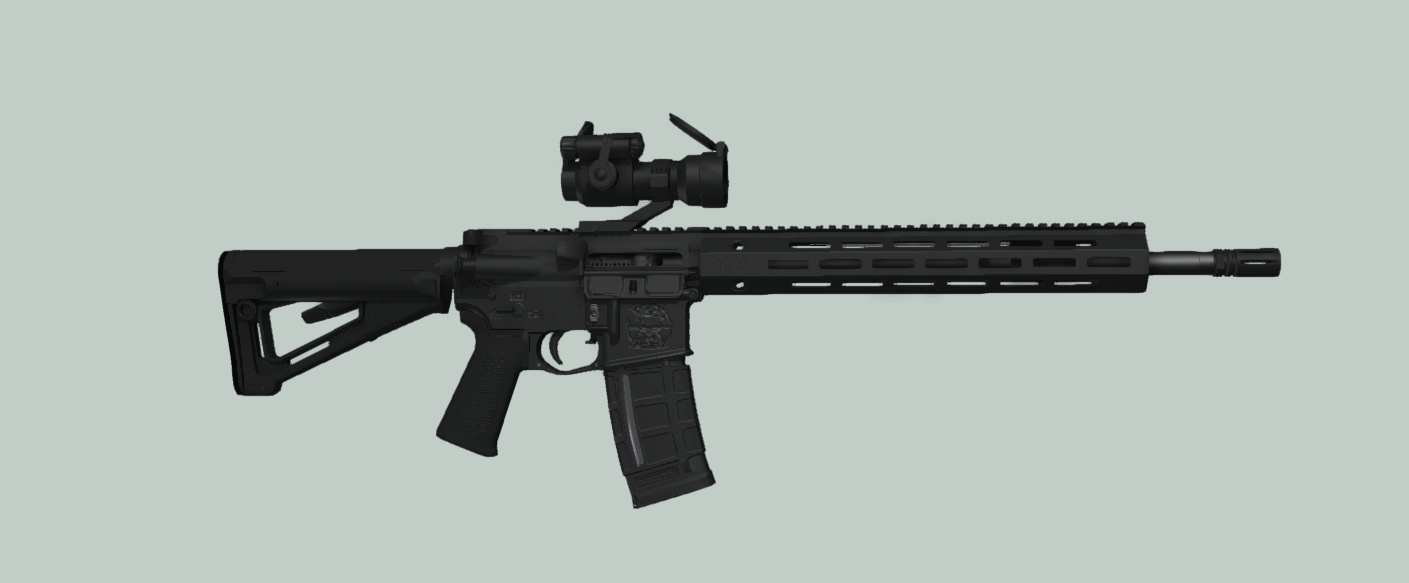
JR-15E2 ENHANCED JOINT RIFLE
FREEDOM FORGE ARMORY LLC
MECHANICSVILLE, VA
CAGE: 7L0D0
RIFLE, CALIBER 5.56mm, JR-15E2, ENHANCED, JOINT RIFLE QUICK REFERENCE OPERATOR GUIDE
RIFLE DISCRIPTION
The JR-15E2 is an intermediate range, gas operated, air cooled, semi-automatic rifle chambered in 5.56x45mm NATO. With ambidextrous controls. Capable of engaging point targets out to 500m. Designed for use by law enforcement and sport shooters.
WARNINGS
· Read and understand these instructions thoroughly before operating the rifle.
· Only use ammunition in good condition that is matched to the chamber of your rifle. (5.56x45mm or 223 Rem)
· Do not make any modifications or alterations to your rifle, modifications may cause an unsafe condition.
· Do not disassemble your rifle beyond the operator level listed in this guide.
· Before handling or disassembling your rifle for cleaning or maintenance ensure that it is unloaded.
· If the rifle becomes submerged it should be returned to Freedom Forge Armory for through inspection prior to use.
· Follow all the rules of safe firearm handling.
UNLOADING
1. Place the selector switch in the safe position.
2. Remove the magazine.
3. Pull the charging handle fully to the rear.
4. Lock the bolt to the rear.
5. Return the charging handle to the locked position.
6. Visually verify the chamber is empty.
THE RIFLE IS UNLOADED.
LOADING
1. Place the selector switch in the safe position.
2. Lock the bolt to the rear.
3. Return the charging handle to the locked position before releasing the bolt
4. Insert a magazine into the mag well.
5. Release the bolt allowing it to go forward under its own power, do not ride the charging handle forward.
THE RIFLE IS NOW LOADED AND READY TO FIRE.
FIRING
1. Firmly shoulder the rifle and take careful aim at your target.
2. Place the selector switch in the fire position.
3. Gently pull the trigger through the first stage to the release point, squeeze through the second stage and release the trigger.
4. The rifle will eject the spent case and cycle the next round until the magazine is empty.
5. The bolt will lock to the rear after the last round is fired.
6. Place the selector switch in the safe position.
BASIC CLEANING AND MAINTENANCE
The JR-15E2 Joint Rifle has been treated with Hornady One Shot prior to leaving production, it is the recommended lubricant and clearer for all Joint Rifles. Follow Hornady instructions for use.
1. Pull the rear retaining pin and hinge the upper receiver forward, do not allow it to slam into the lower.
2. Remove the bolt and charging handle as a unit.
3. Disassemble the bolt and bolt carrier for cleaning.
4. Clean the upper receiver paying special attention to the locking lugs area.
5. Clean the chamber and barrel.
6. Clean out any debris from the fire control area of the lower receiver. Do not removed the fire controls.
7. Remove the buffer and spring, and wipe it down do not put any oils or cleaners on the buffer, spring, or in the buffer tube.
8. Reassemble the bolt and bolt carrier.
9. Ensure that no obstructions are in the barrel.
10. Insert the charging handle into the slot about one inch.
11. Ensure that the bolt and carrier are properly assembled.
12. Ensure that the bolt is in the extended position before placing it back in the upper receiver.
13. Place the bolt in the upper receiver and push it to the locked position.
14. Close the upper receiver and install the retaining pin.
15. Perform a function check of the rifle.
WARNING
DO NOT PLACE ANY OBJECTS, CLEANING AGENTS, OR OILS IN THE GAS TUBE FOR CLEANING. CLEANING OF THE GAS TUBE IS NOT REQUIRED. FAILURE TO FOLLOW THIS WARNING WILL LEAD TO DISTRUCTION OF THE RIFLE AND SERIOUS BODILY HARM OR DEATH.
FUNCTION CHECK
1. Remove the magazine.
2. Follow all the steps for unloading the rifle.
3. On an empty chamber release the bolt.
4. Place the selector switch in the fire position.
5. Pull the trigger. The hammer should fall with and audible click. Hold the trigger in the rearward position.
6. Pull the charging handle to the rear and release it, while holding the trigger in the rearward position.
7. Release the trigger, the trigger should return to the forward position and the sear should engage with an audible click.
8. Pull the trigger, the hammer should release with and audible click.
9. The function check is complete and the rifle is in safe condition for use.
WARNING
IF THE RIFLE FAILS THE FUNCTION CHECK IT SHOULD NOT BE FIRED CONTACT FREEDOM FORGE ARMORY FOR EVALUATION AND REPAIR.
FIXING MALFUNCTIONS WHILE FIRING
S.P.O.R.T.S
1. Slap forcefully up on the magazine.
2. Pull the charging handle fully to the rear.
3. Observe the ejection port for an ejected round and the chamber for obstructions.
4. Release the charging handle.
5. Tap the forward assist.
6. Shoot.
If SPORTS fails to fix the problem the rifle should be unloaded and contact Freedom Forge Armory before further use.
CAUTIONS AND NOTES
· Use of Binary Trigger systems has not been tested or approved for use in any Joint Rifle System.
· Use of aftermarket gas systems (impingement or piston driven) has not been tested or approved for use in any Joint Rifle System.
· Any modification or alteration made by the user to any Joint Rifle will void the manufacturer warranty.
· Joint Rifle Systems are designed for use with Freedom Forge Armory suppressors, bore alignment should be carefully checked prior to use. Freedom Forge Armory will not guaranty the proper function of the rifle with any other brand of suppressor.
· Do not remove a suppressor attachment muzzle device once it has been installed.
· Joint Rifles are treated with Hornady One Shot prior to being shipped. Freedom Forge Armory recommends the continued use of One Shot for cleaning and lubrication, follow all Hornady One Shot instructions when using this product.
· Do not use 5.56 or .223 ammunition lighter than 55gr or heavier than 75gr. Bullet fragmentation may occur.
WARRANTY
Freedom Forge Armory Joint Rifle Systems are warrantied against manufacturer defect for the intended life of the rifle. Wear and tear through normal use, damage caused by hand loaded ammunition, user unauthorized modification, alteration, misuse, negligence, or abuse is not covered under this warranty. Freedom Forge Armory reserves the right to refuse a warranty claim if use of hand loaded ammunition, unauthorized modification, alteration, misuse, negligence, or abuse is suspected.
(Unauthorized modifications and alterations include the changing or alteration of the fire control group, bolt and bolt carrier, gas system, barrel, handguard, grip, upper and lower receiver, charging handle, buffer or buffer spring, muzzle device, and other rifle controls) (Operator added sights, sight mounts, and rail mounted accessories will not void the warranty as long as they do not interfere with the function of the rifle.)
CONTACT
FREEDOM FORGE ARMORY LLC
MECHANICSVILLE, VA
CAGE: 7L0D0
freedomforgearmory@comcast.net