Building a Galil AR from a kit. Part One

Written By: Brandon Pritchard, Master Gunsmith at Freedom Forge Armory
Photos By: Freedom Forge Armory
 The Israeli IWI Galil, unless you grew up in the 80's prior to the 89 importation ban most people aren't familiar with the IWI Galil. I'm not talking about the new Galil ACE from IMI but the original Galil used by the Israeli military until it was recently replaced by the Tavor X95 in front line service. The Galil ARM and AR has made some what of a come back, there are several manufacturers offering Galil's built out of parts kits and they appear to be pretty popular and reasonable priced. Original imported IWI Galil's fetch premium prices on the market.
I've handled an shot several IWI Galil AR's and ARM's in 5.56mm and 7.62mm. I was always impressed with them, it's been a bucket list rifle for me for a long time, so when I had an opportunity to buy one and the price was right, I jumped on it, with the stipulation, "some assembly required." Now, I'll admit I'm not an AK guy, I own a few and worked on plenty of them, so I understand how they work but I've never built one from parts. So let's jump right into the deep end and see how this shakes out.
So what exactly is an IWI Galil? It's not an AK even though it resembles one and it's not an AR-15, it's a uniquely Israeli design, that takes the best features of the AK, M16, and FN FAL then rolls it into one package and answers the problems that the Israelis had with their small arms.
History of the IWI Galil.
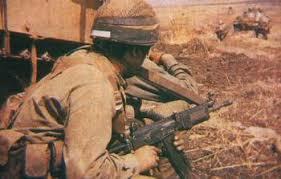 An Israeli soldier takes cover behind an armored vehicle with his Galil AR.
The Galil is a family of Israeli made automatic rifles designed by Yisrael Galil and Yaacov Lior in the late 1960s, and produced by Israel Military Industries. The design is closely based on the Finnish Valmet Rk 62, which is itself an improved version of the Soviet AK-47. Most Galils are chambered for either the 5.56×45mm NATO or 7.62×51mm NATO cartridges. The Israeli army used the 5.56×45mm NATO caliber Galil in three basic configurations. The Automatic Rifle Machine-gun (ARM) with a bi-pod, wire-cutter and carrying handle would become the standard service rifle issued to front line infantry troops. This is the version that famously features a bottle opener in the front handguard. The Automatic Rifle (AR) without the bi-pod, wire-cutter and carrying handle was issued to support troops and military police units. The Short Automatic Rifle (SAR), with a shortened barrel, was issued to vehicle crews, army staff and specialty troops.
In the late 1950s, the Israel Defense Forces adopted the FN FAL. The FAL first saw major combat with the Israelis during the Six-Day War in 1967. Although Israel won decisive victories, the FAL showed its limitations in IDF service, a common complaint was that the sand and dusty conditions caused the FAL to malfunction.
During the Six-Day War, the Israelis captured thousands of AK-47 assault rifles and evaluated them. The rifle proved far more reliable and controllable than the FAL, and the required maintenance was low enough that the conscripted troops wouldn't need additional training in the rifles care. Because of this, the IDF began the process of procuring a new automatic rifle that would offer the same benefits of low-maintenance as the AK-47 but with the accuracy of the M16 and FAL. Several weapons were submitted for the lucrative deal of becoming the Israeli Army's standard-issue assault rifle. America offered the M16A1 and Stoner 63, and Germany offered the HK33. The AK-47 design was also considered, but because of the Cold War and Israel being friendly to the west procurement was difficult and limited its viability.
Another design was offered by Yisrael Galil. The first Galils were manufactured using Valmet Rk 62 receivers. Galil's rifle was chambered in 5.56×45mm round, which was unique for a middle eastern military. At the time, the United States was replacing France as Israel's main partner and weapons supplier. Tests conducted from the end of the 1960s to the early 1970s led to Galili's rifle emerging as the winner. However, issuing of the Galil was delayed by the sudden onset of the Yom Kippur War in 1973.
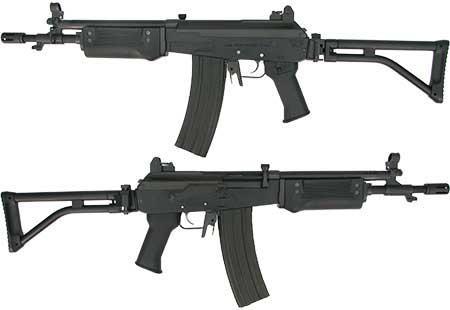
 IWI Galil ARM
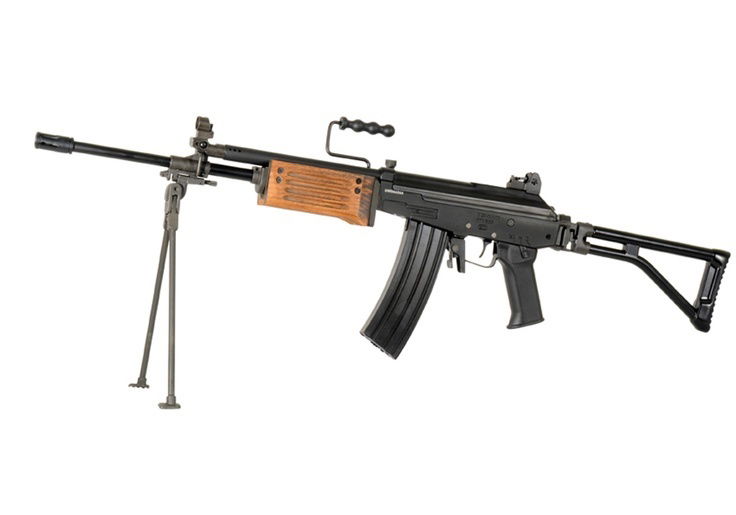
 IWI Galil AR
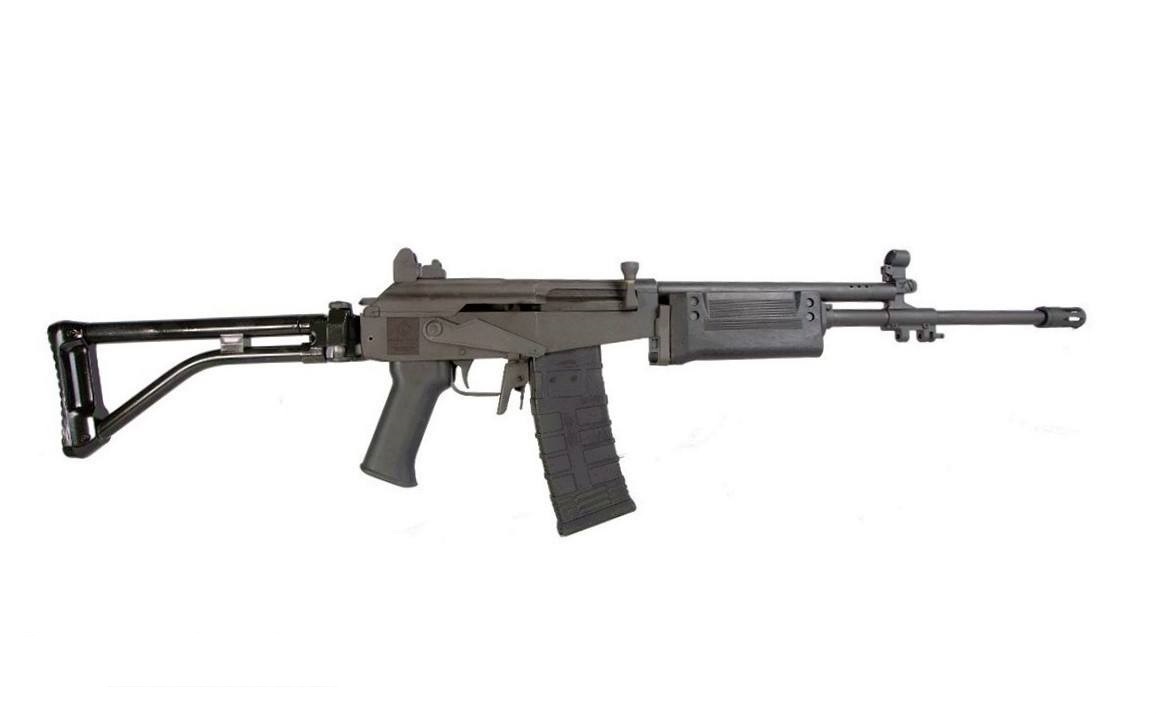
 IWI Galil SAR
Tearing down the kit.
The kit I picked up came with all the parts less the receiver and six original 35 round magazines, plus some extras.
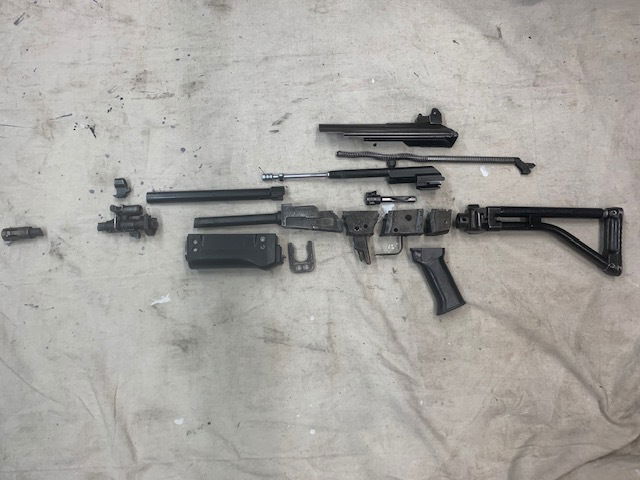
Before I can put anything together I've got to take reclaim the parts I'll need out of the kit. It has all the parts but they are still attached to the original sections of the cut up receiver and barrel. Like all AK based designs parts are pressed and riveted on so that means drilling and bucking rivets, and pressing out old parts.
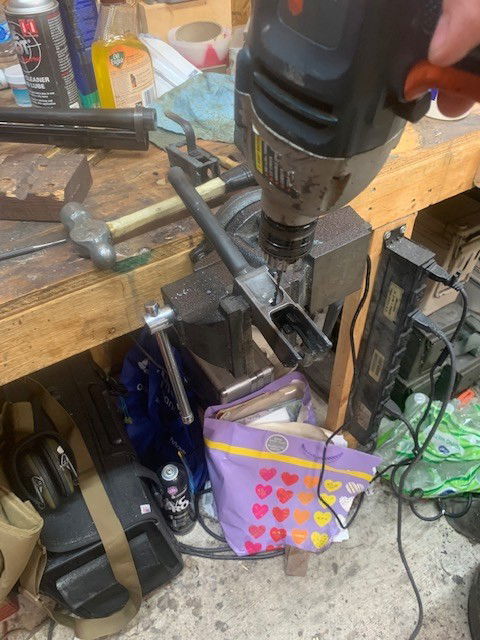
I'll start with the front receiver section, I need the bullet guide out of the old receiver to put in the new receiver. I'll start by dimpling the side of the rivet that I'm going to drill out with an auto punch. Then run the drill bit backwards in the dimple. (Running the drill backwards in the dimple is a trick I learned as an aircraft mechanic to keep the bit from walking off the rivet head.) Finally I'll run it forwards at a moderate speed until I hit the old receiver and I'll drive out the rest of the old rivet with a punch.
 Drilling out the bullet guide.
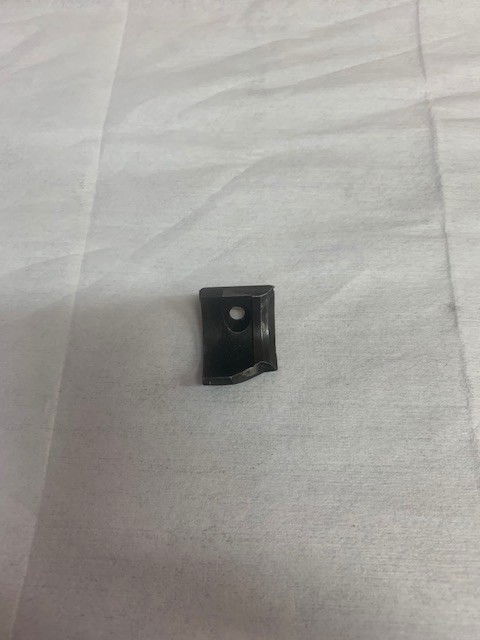
The removed bullet guide.
Next I need to get the magazine catch and trigger guard off. There's a total of five rivets here that need to be removed. The mag catch and trigger guard are made of a thin sheet metal. I'll use the same technique as before but going much slower and checking progress frequently to ensure I'm not drilling into the parts I need to save. These rivets were the most difficult to get out due to their location and size. Also, these aren't pop rivets, they are hardened steel and a lot tougher than you think.
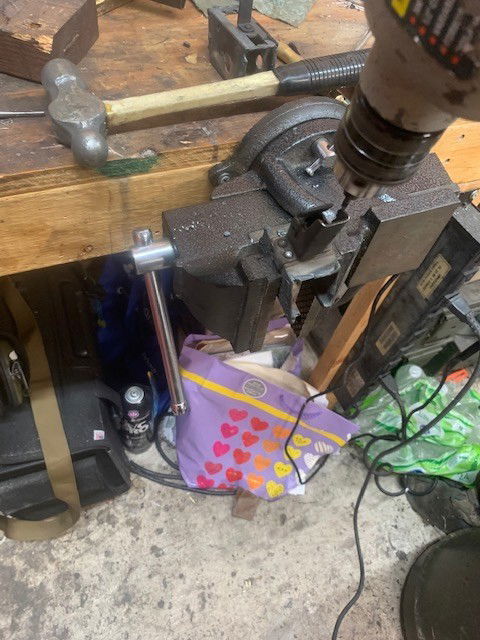
Drilling out the magazine catch rivets.
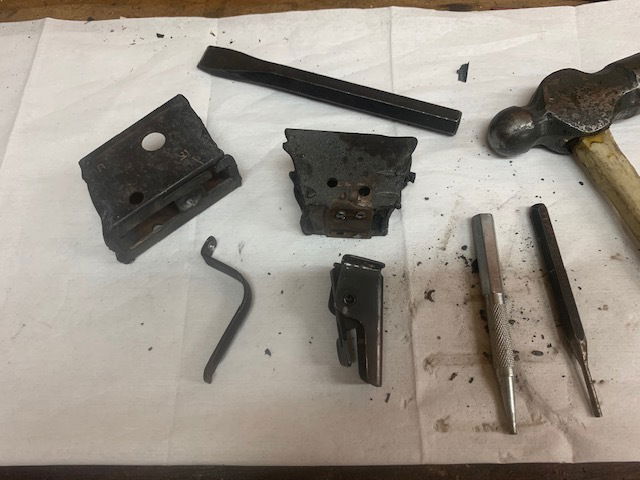
The removed magazine catch and trigger guard.
That's it for the teardown on the receiver. Let's move on to the parts I'll need off of the old barrel. Thanks to ATF import restrictions surplus barrels can't be imported intact and this one has been torch cut. I'll chuck it up in my mill and cut off the mangled section of the barrel with a milling cutter, and so I've got a good surface to press against to get the parts off I need with out damaging them. The two parts I want are the gas block and the handguard retainer. I might try to save the flash hider but if I can't there are plenty of them on the market right now.
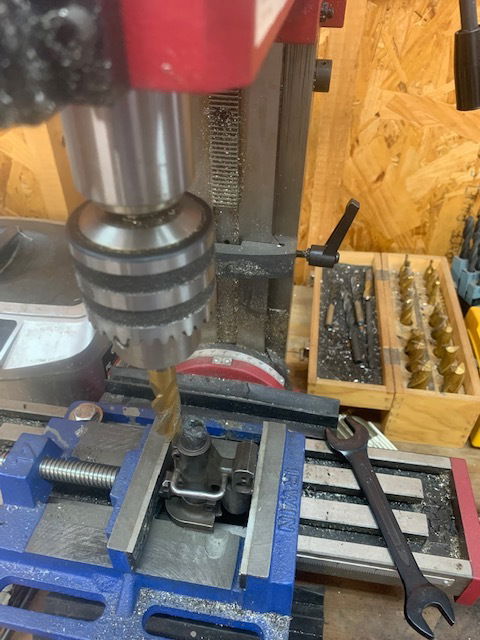
Setting up to mill off the torch cut section of the barrel
The gas block is pressed and pinned on and now that I have a barrel section that the block will slide over I'll drive the pins out and throw the rest in the press to get the old barrel out. A hydraulic press is the only way to do get these parts off, I'll use the press to drive down the barrel stub flush with the gas block then place a heavy punch on the stub to drive it the rest of the way through the gas block. I'm going to save this section of barrel for later so I can measure the gas hole angle and diameter and handguard retainer cut for the new barrel.
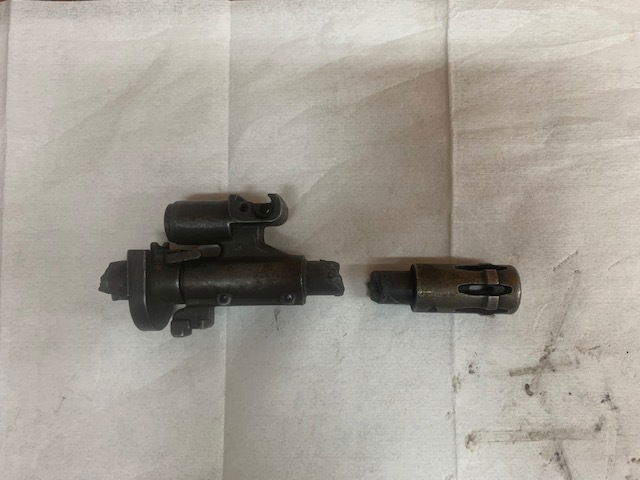
Gas block, handguard retainer, and flash hider before cutting
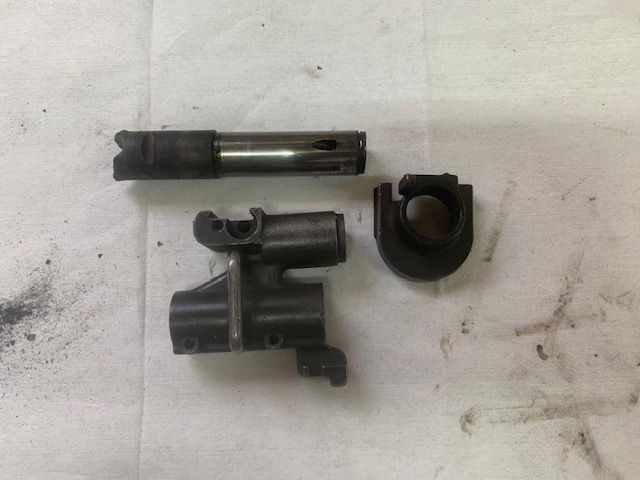
The barrel parts removed from the old barrel.
I'll take all of these parts and sand blast the old finish off of them so I can refinish them later.
That takes care of the teardown of kit, in the next part I'll start building up the new receiver once it arrives.